Wednesday, April 09, 2014

Rebuilding a Muscle Body GI Joe - Part Two

Adventure Team meeting in progress!
In the previous post, I talked about stumbling onto some muscle body GI Joes in my brother-in-law's storage locker. The action figures had suffered the same fate as so many muscle body Joes: the rubber skeleton inside the figure that held all the parts together had rotted away and the arms, legs, and head fell off the body. Since I had always wanted some muscle body Joes for my collection, I thought I could rebuild the figures with the help of some careful Internet searches. Trouble was, there was very little available online for the do-it-yourself rebuilder, so I decided to come up with my own way of rebuilding my Joes. The following is a step-by-step explanation of what I did to make my talking GI Joe Commander whole again. Only time will tell if my repairs will hold up, so I make no promises that this is the best way to go, but if you want to rebuild a muscle body Joe and have no other ideas on how to go about it, I offer my solutions as food for thought. If you did not read the first part of this post, you may want to go back and read about my thought process for these repairs. Okay, here goes:

1) I'm assuming that, like my Joe, your Joe has completely fallen apart. Therefore, let's start by separating the front body piece from the back body piece. To do that, insert a thin screwdriver into the seam between the two sections. The upper arm socket is a good place to start since there is a hole there. Gently work your way along the seam to the neck, wiggling the screwdriver a bit to widen the gap between the two halves. Go slow and don't use too much force or you'll break the body parts. It may take a few passes around the body seam to fully pry it open. Once you get one side partially open, you may also want to place a screwdriver in that side to hold it open while you work on the other side. Eventually, the pins will work loose from the holes they are seated in. With luck, the pins will not break but, in all likelihood, most if not all the pins may break. Don't panic as we will be gluing the whole thing back together with modeling glue.

3) You'll want to use this same technique to pry apart the upper arm sections and the upper leg sections. Remove any leftover rubber bits and lay the pieces on your work table where they will need to go (e.g., upper right arm sections on the upper right hand side of the body, head stalk and head at the top, etc.). You want the work table to look like an exploded drawing of your Joe. That way, you know where the parts are supposed to go back together.
Muscle body GI Joe with body section opened.
2) Once you have the two body halves apart, you can get a view of the inner workings. You will likely have bits of dried rubber inside. Carefully remove the excess rubber. Also, if you are working with a talking Joe, the talking mechanism will be in the body. The mechanism has some foam rubber attached to protect the mechanism. If it is dry rotted, delicately remove the old foam and replace it with new foam that has a sticky side. I used some insulation foam from another household project. Cut it to the size and shape of the old foam and stick it to the mechanism in the appropriate spots. Lift out the mechanism and set it aside for now.

3) With the top of the body removed, you can also see how the legs were attached. In my case, the remnants of the rubber skeleton were visible in Joe's speedo shorts. A loop of rubber still clung to the large peg in his abdomen. Remove the excess rubber bits.

4) The upper leg sections should have a semi-circular cap inside. This sat just above the rubber half-ball part of the rubber skeleton. Since we will be using shock cord to string the legs to the torso, we'll need to create a plastic ball to replace the rubber half-ball. To do this, place some plastic modeling pellets in warm water. When they have softened, remove the blob of melted pellets and begin to shape them into a ball that will sit underneath the semi-circular cap. Once you have the ball at the right size, take a wooden skewer or some other thin, pointed rod and work it through the center of the ball. This will create the hole that the shock cord will pass through. It should only be just big enough for the cord to slide through. Once you have finished creating the ball, see how it fits under the disc and within the thigh pieces. If it's too big, you won't be able to close the two upper leg sections together when you reassemble it. Repeat the process for the other side.

5) Set the balls and caps aside. Now we will concentrate on the knee pegs. The knee pegs from an original GI Joe will work for the muscle body Joe with some adjustments (replacement pegs can be obtained from Cotswold Collectibles). There's a peg and slot arrangement the two halves of the upper leg sections. If you bore out the hole in the vinyl knee peg a little bit, you should be able to fit the peg onto the slot on one half of the upper leg. To check the fit, snap the two thigh pieces together and see how the peg moves. The hole in the top of the calf piece will be too big to receive the knee peg. To make the fit tight, I put some of the soft plastic pellet material into the calf hole and jammed the knee peg into it. The plastic pellet material will fill up the excess space and form a custom hole for the peg. You may have to cut away some excess material that might ooze out the top. With the pegs fitted to size, open up the thigh pieces and set aside. Repeat the process on the other thigh.

6) You can attach the feet to the calf pieces by using a wrist peg from an original Joe. Cut the original rivet out of the foot with needle nose pliers. If you do not have pliers that are small enough, you can use a small saw but be extremely careful not to cut up the foot. With the old rivet removed, line up the wrist peg with the loop inside the opening in the top of the foot. Insert a new rivet (3/32" X 7/16") in the hole on the foot from the small toe side of the foot so that it captures the loop of the peg. Rest the head of the peg on a hard surface and place a center punch inside the tube end of the rivet. Strike carefully with a hammer. The feet might move around loosely, but they will attach to the hole in the bottom of the calf.

7) Okay, this is where it gets a little dodgy. Start with an ten-inch length of shock cord. Wrap it around the long pin in the lower abdomen of the figure, then tie a tight knot in the center, leaving equal lengths of cord on either side of the knot. Run the lengths of cord through the leg holes of the speedo shorts. Place the outer half of the right thigh into the leg hole of the shorts and let it lay flat on the table with the length of cord laying inside the piece.
View of abdomen with shock cord tied around the large peg. The cord runs through both sides of hip sockets into the semi-circular plastic caps and my custom balls that I made. The taut cord is secured with metal end crimps used in jewelry making. Note how the left thigh section fits over the cap and ball.
Thread the semi-circular plastic cap onto the cord, followed by your custom-made plastic ball. Push the two pieces up to the top of the thigh and pull the shock cord taut. While holding everything tightly in place, slide a crimp end onto the cord and up to the bottom of the ball. Then crimp the crimp end with a crimping tool (you might need an extra set of hands to pull this off). When you release the cord, everything should be held tightly in the upper part of the thigh piece. Cut off any excess cord. Be sure that the knee peg is still on the slot in the other thigh segment and glue the inner thigh piece to the outer thigh piece with modeling glue. The cord and ball arrangement, along with the knee peg, should now be securely contained between the two upper leg segments. Repeat the same process with the left thigh.
Another view of the leg repair.
8) When you have finished step 7, the thighs should be attached to the body tautly, but with some twisting movement for poseability. The knee peg which we attached earlier should be held in place by the two halves of the thigh and ready to receive the calf and foot. With legs assembled, we can move on to the top of the figure.
The upper body repair kit from Cotswold Collectibles. The "T" shaped joints fit into the shoulders, the joints with the balls on one end attach the upper arm to the forearm, and the length of elastic cord is used to attach the head plug to the body.
9) With the figure laying flat on your work table, Take one of the "T" shaped shoulder joints from your repair kit and place it in the upper left arm segment so that the top of the "T" is nestled in the appropriate slot. The disc side of the joint will be fitted into the body later.

10) Remove the rivets from the elbow area of the forearms using the same technique as we used on the feet. Take the elbow joint from the repair kit and place the disc side into the slot of the forearm. Slide a new rivet through the hole in the slot starting from the thumb side. Position the head side of the rivet against the table and tap the tube side with a center punch the same way as was done on the feet.

11) Set the ball side of the elbow joint into the bottom part of the upper arm. With the two joints in place, glue the top half of the upper arm to the bottom half with modeling glue. Repeat the same process for the right arm.

12) If you are not rebuilding a talking GI Joe, you can skip this step. For those who are, this is when you return the talking mechanism to the chest cavity. In my case, the mechanism was not working, so I replaced the speaker with a new one from Cotswold Collectibles. Simply remove the old speaker and put in the new one, making sure that the indentation in the center of the speaker is facing out toward you. Set the talking mechanism back into the chest on top of the speaker. Thread the pull cord through the grommit in the shoulder and tie the cord to GI Joe's dog tags.
Upper body with talking mechanism in place. The new speaker is underneath the mechanism. Note the shoulder pegs installed in the upper arms, the elbow pegs are in place and connected to the forearm, and the elastic cord is in place to receive the head plug.
13) We now move on to the head. Take the head plug shock cord from the repair kit and slide the eyelet end over the retaining pin closest to the neck opening in the bottom body section. Set the arms in place with the disc part of the shoulder joint set in the arm socket hole. At this point, you can glue the top half of the body section to the bottom half. Be careful to keep the head plug cord, shoulder joints, and talking mechanism in their proper places as you seal up the body. You don't want to have to crack open the body again once its glued down.

14) Once the body is glued together and the glue has fully dried, you can reattach the head plug and head. You will likely need to heat the head with a hair dryer to remove the head plug. Once you have heated the head, use a pair of needle nosed pliers to grip the head plug and pull down until the plug is removed. Thread the head plug cord through the head plug and pull the cord through the top. While holding the elastic cord taut, slide on the brass piece of tubing provided in the repair kit and crimp it to the top of the plug with a wire crimper. Cut away the excess elastic. Reheat the head with the hair dryer and slide the head over the plug.
Muscle Body Talking GI Joe Commander is fully assembled. 
At this point, you can breathe again: your muscle body Joe is fully assembled! While I can't guarantee that this repair will be strong enough to hold up to a full day on the playground with a 10-year-old, it should be sturdy enough so that a middle-aged man can dress him up in some vintage Joe duds and put him on display with the help of a doll stand.

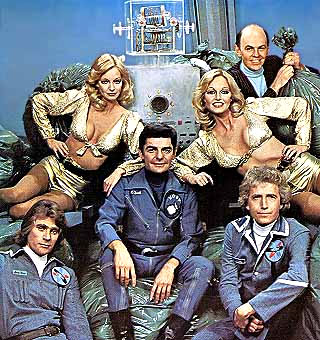
"C'mon, the Adventure Team is needed!"

Tuesday, April 08, 2014

Rebuilding a Muscle Body GI Joe - Part One

Original body GI Joe compared to "Life Like" Muscle Body GI Joe
When I started collecting action figures in the late 90s, my goal was to not only acquire all the figures I owned as a kid, but to find the ones I wanted but never had. The "life like" or muscle body GI Joes from 1976 were among those figures that I just missed owning. While I liked the beefier looking bodies, I wasn't crazy about the whole trend that Joe was taking at the time with Bullet Man and the Alien Intruders, so I decided to focus on Star Trek and Space: 1999 figures instead. By the time I was back into full collecting mode at the turn of the new century, most muscle body Joes could only be found as a pile of limbs and heads, thanks to the cost-saving measures Hasbro took in making these figures. It seems that, with the cost of plastic rising due to the oil embargo, Hasbro had to come up with a way to make the big 11 ½" Joes cheaper to produce. Their solution was to make his body and most of the limbs out of hard plastic shell pieces that could be glued together like a model airplane. To attach the various limbs to the body and one another, the inside of the figure had what I can only describe as a rubber skeleton that held the arms and legs to the body and allowed the limbs to twist and bend. Sadly, after a dozen years or so, the rubber skeleton would dry rot and the figure would simply fall apart.

Given the small number of muscle body Joes made in the US (only one year of production) and the scarcity of ones that were still intact, the prices were usually more than I wanted to pay. Then last year, while I was helping my brother-in-law clean out a storage locker, I found a G.I. Joe playset filled with muscle body Joes along with a Mike Powers, Atomic Man. Of course, the muscle body figures had fallen to pieces, but all the pieces were still in the playset. Since my brother-in-law had no interest in them anymore, I was glad to take them home and try to rebuild them. This storage locker find took some of the pressure off me. I didn't have to pay for the figures on top of whatever it would cost to rebuild them and, if I damaged them in the process, it was better than if they had been thrown away.
The playset and GI Joes found in my brother-in-law's storage locker. Of course, this is after they were repaired and cleaned up.
I started researching how to rebuild muscle body Joes and, to my surprise, there was not a whole lot of information available. There were people who would rebuild them for a fee, but no instructions on the web for do-it-yourselfers. I did find a repair kit from Cotswold Collectibles which was designed to rebuild the top half of the figure. Specifically, the kit provides a thick shock cord to reattach the head to the body, special shoulder joints to reattach the upper arms, and elbow joints to connect the upper and lower arm pieces. The kit is a variation on the pieces that were used for the old Talking GI Joe Commander figure. Since the talking Joes had the talking device inside the body cavity, the head and legs could not be attached to the body with shock cord and hook-in-eye hardware like the regular Joes, so a new system of joints were used. Why the muscle body Joes didn't use a similar arrangement as the old talking Joes is unclear, but it works for them all the same.

Since my African-American Joe still had legs attached, I decided to use the repair kit on him first. The instructions provided with the kit were well detailed and the repair was faster and simpler than I anticipated. About one hour of work and I could display the figure in my case. The muscle body talking Joe was another matter altogether. Since I could not find any repair solutions for the legs online, I had to come up with a solution on my own. That meant taking the body completely apart and assessing how the thing was put together originally.
My muscle body talking GI Joe with the detached arms, legs, and head. I opened the body section and the left thigh to figure out how the guy was put together. Note: the foam rubber in the left shoulder is a replacement piece since the original piece disintegrated.
The rubber skeleton which held the legs to the torso started with a loop around a post in the lower part of the body. Two lengths of rubber extended from the loop, each length running down to the legs. When I pulled apart the two plastic shells that were glued together to create the thigh, I discovered that the rubber line that extended into the thigh grew into a rubber half-ball. This half-ball was nestled in a plastic cap at the top of the thigh. This is what kept the thigh firmly attached against the hip socket. A length of rubber continued from the bottom of the half-ball to the knee. Here the rubber was formed into a small loop which was designed to receive a pin inside the plastic shell. The solid plastic calf piece also connected to this pin. Actually, the calf piece is not completely solid as it has a hole down the center to receive the rest of the rubber skeleton. The rubber finally terminated in a loop. This loop would hold a rivet joining the foot to the bottom of the calf piece.
The semi-circular cap and rubber skeleton inside the thigh. The cap sat on top of the semi-circle of rubber, and the long piece (now dry rotted and broken) ran down the thigh to the knee joint.
So, in effect, a single, custom-made rubber skeleton held the thighs, calves, and feet of the figure to the torso. My challenge was to find a way to replace that skeleton with parts I could buy or manufacture myself. I started with the easiest part first: attaching the feet, calves, and thighs together. On the original GI Joes, these parts were connected with metal rivets and vinyl pegs (in other words, parts that were actually designed to last for a long time). I decided to see if replacement Joe pegs could do the job, so I bought some pegs of different sizes from Cotswold Collectibles. I tried various combinations, but none of the pegs fit exactly right. I decided to let that problem simmer for awhile and moved onto the hip socket.

On the original Joes, the thighs were made of solid poly-vinyl plastic and were attached to the hip sockets using metal hook-in-eye hardware. The necessary tension was provided by a thick shock cord inside the body that also held the arms and head. Shock cord could be the answer here, but since the head and arms would be attached using the repair kit, the shock cord would only be used in the lower part of the body and had to be attached in a way that would create proper tension between the socket and the thigh. I went back to the rubber skeleton for inspiration.
A view of the rubber loop that wrapped around the pin in the abdomen. The rubber skeleton (shown above) continued down into the thighs and legs. Unfortunately, I can only show you everything in pieces because the rubber dry rotted and crumbled apart.
The top of the skeleton had a loop around a pin inside the body. The shock cord could be tied around the pin and the two lengths of cord extending from the knot would go into the thighs. The rubber skeleton had a half-ball shape formed in it to hold the thigh in the socket. Perhaps I could create a ball of the same size with a hole in the middle through which I could run the shock cord. I would pull the cord tight and clamp it to the underside of the ball with a crimped clasp. That sounded good in theory, but where would the parts come from?

For the ball, I started looking at beads in craft stores. Nothing seemed to be exactly the right size. Also, the holes in the beads were so small, I would have to find shock cord that might be too thin to do the job. My wife suggested that I could make the balls myself using plastic modeling pellets. I was not aware of the product, but she ordered me some. The stuff is exactly like it sounds: little plastic beads that become soft and pliable when dropped in warm water. Once they are soft, you can pull them from the water and mold them like modeling clay into whatever shape you like. You have to work fast though, since they harden in the cool air. If you don't get it right before the stuff hardens, however, you can drop the plastic back into warm water and start again.
Another view of the abdomen and thigh. I would custom make plastic balls to replace the semi-circle of rubber holding the cap in the hip socket and replace the rest of the rubber with shock cord.
With a product to make the ball, I had to find the right shock cord. Shock cord comes in all sizes. I wanted cord that was thick enough to hold up to the tension I needed, but thin enough to tie in a knot inside the body and thread through a ball that would fit inside Joe's thigh. I settled on 3/32" thick shock cord that is sold for repairing camping tents. Once I had the shock cord, I molded my plastic balls and created holes in them that were just big enough to accept the cord. Now I needed clasps small enough to fit in the thigh but big and thick enough to hold the shock cord taut for many years to come. This proved to be the most time consuming search. I settled on some end crimps used for jewelry making that I picked up at a craft store. Not perfect, but they would do the job.

With all the pieces in place, I could now reassemble my muscle body GI Joe. In part two, I will go through the step-by-step process of rebuilding a muscle body talking GI Joe Commander.

Friday, April 22, 2011

Easter Weekend 40 Years Ago

With Easter approaching, I've become nostalgic over my favorite Easter weekend which occurred 40 years ago. In fact, Easter 1971 is the only Easter I can remember with any clarity. Many Christmases are emblazoned on my cranium, but for some reason, I don't remember much about Easters past except one.

The holiday break from school that year started on Good Friday. I was in first grade and not yet familiar with the predictable ebb and flow of school vacations, so this 10-day escape from reading and arithmetic was a real treat. I was also jazzed because this would be the day I got my new kitty cat. Our last cat, a ginger tabby named Sassy, had been hit by a car a couple months earlier and, since our dog Patty was not the most exciting pet in the world, I was eager to get a new cat. A lady around the corner had a female cat who had just delivered a litter, but we had to wait six weeks for the kittens to be weened. To a six-year-old, that's like a decade. Almost everyday, I nagged my mother about getting the new cat, but she patiently told me we had to wait. Well, Good Friday was the day!

When we got to the lady's house, she had her cat and the kittens out on the front lawn. Several kids and their mothers were already there to nab a kitten for themselves. They were all gray tabbies, which meant they all looked basically alike. I noticed, however, that one of the females had some orange running through its fur and an orange streak across her belly. She was special, so that was the one I chose.

She was such a tiny thing, I marveled at how dwarfed she was by the furniture as she scampered across the living room carpet. My mom was more concerned about how the cat and the dog would get along, but the little kitten walked right up to Patty who was snoozing in the kitchen and rubbed herself against the dog's muzzle. Patty looked up at us as if to say, "Do I have to put up with this?" Yes, she did.

Since the kitten was born in March, my mom said we should call her "Windy." Of course, that eventually evolved into Wendy, and she lived for over 18 years. I  was well into adulthood before the old girl finally had had enough.

The weekend also stood out in my mind because it was the premiere weekend for the first independent television channel in Baltimore, WBFF-TV 45. It's hard to believe that there was once a time when you only had three or four TV channels to choose from. In 1971, Baltimore had the three network affiliates and a public television station. An independent channel opened up a whole new world of television options, mainly syndicated kid shows and old black-and-white movies, but that was pretty exciting in 1971.

The main attraction for me, of course, were the kid shows. Suddenly, I was exposed to all manner of Japanese fare (Astro Boy, Marine Boy, Ultra-Man, and Speed Racer), along with the Supermarionation fun from Gerry Anderson's Century 21 Productions (Thunderbirds and Captain Scarlet). There was also a lot of old stuff I had never seen before like The Three Stooges, The Little Rascals, and Ruff and Reddy (I still have the theme song stuck in my head). All this juvenile goodness was brought to us courtesy of Channel 45's new kiddie show host, Captain Chesapeake. Here was his intro:


After running teaser shows Friday and Saturday, WBFF-TV officially began broadcasting on Easter morning. I remember turning the TV on first thing so I could watch the new (to me) programming while I dug into my Easter basket. And this year was really special because, in addition to the candy and eggs that we had dyed a few days earlier with Paas egg dyes, my mom included some small toys for my brother and I. The ones that stand out the most in my mind were the Wizzer tops from Mattel. Wizzer tops had been around for a couple of years by then, but these new tops were shaped like soda cans. I got the Seven-Up can version while my brother got the Coca-Cola can. Below is a picture of the box it came in:

As you can see by the picture on the box, what made Wizzer tops special was that, unlike a regular top where you had to wind a string around it and pull the string off really fast to get the top to spin, Wizzer tops had a rubber tip on the bottom that you rolled along the ground really fast to get the tip spinning. Then you set it on the floor and let it fly. Great stuff for a six-year-old.

Of course, all good things must come to an end (at least temporarily), and we had to go to church for Easter service. Mom crammed me into one of my brother's hand-me-down suits, snapped the clip-on tie to my collar, and off we went. Church was always dead boring for me, so I just studied everyone in the church, wondering how old they were or how much they weighed or if that sinister looking guy was a criminal. Fortunately, it was only an hour and I could get back home to my half-eaten bunny and my top.

The weather was unusually warm for Baltimore in April, and I recall us going to a nearby park in the afternoon. I enjoyed being in the warm sun and swinging on the swings, but I really wanted to get back home so I could watch Ultra-Man. The next day, I woke up and turned on WBFF-TV right away to see what they were showing. Unfortunately, it was a test pattern. They wouldn't start their weekday programming until three in the afternoon when Captain Chesapeake would begin. Oh well, can't all be gravy.
At least my mom got us some new breakfast cereal we had seen on TV: Count Chocula and Frankenberry. The commercials were so much fun, the cereal had to taste great, right? Nope. Even to my underdeveloped palate, the fake chocolate flavoring on the Count Chocula was really horrible, like stale Nestle's Quik. The strawberry flavor on the Frankenberry was better, but there was just something crappy about it. I kinda regretted asking for it. Now I was stuck eating both boxes or risk the ire of my mom.

Despite the cereal fiasco, the rest of the week was so much fun. Easter break was a new experience for me, so I guess the newness of it made it so special. Once I was back in school, I could see light at the end of the tunnel. First grade would be over in about eight weeks. That wasn't much longer than the time it took to get a new kitty cat. If I could survive that wait, I could make it to summer. The rhythms of life were beginning to dawn on me.

Wednesday, April 20, 2011

Elisabeth Sladen Dies at 63


I was crushed to read the news this morning that Elisabeth Sladen, best known as Sarah Jane Smith from Doctor Who, has died at age 63. Doctor Who became a favorite of mine even before the show was aired in the United States. In 1977, I found a copy of  The Making of Doctor Who in my local comic book store and read about this remarkable show which was a pop culture fixture in the UK but barely known about in the states. Since Elisabeth Sladen was the Doctor's companion at the time the book was written, it was full of photographs and references to Sarah Jane Smith. My little 13-year-old heart was instantly captivated by the brunette with the the big smile.

Intrigued by this initial taste of Dr. Who, I told the comic store owner to be on the look out for any more Dr. Who material he might come across. I also scoured comic shows for the numerous novel adaptations of the show. Soon, I had a pile of Dr. Who novels, magazines, and annuals before I ever watched a single episode of the show, and I was particularly interested in anything related to Sarah Jane.

In the fall of 1979, the first four seasons of the Tom Baker era were broadcast in the United States and most of those episodes featured Elisabeth Sladen as his companion. Now I was really smitten. She had a certain playfulness which worked well with Tom Baker's naughty boy approach to the Doctor. It was as if she was the understanding elementary school teacher to her precocious student. Most of the other Dr. Who companions were simply there to follow orders and ask the questions that the audience might be thinking as the story unfolded. Sarah Jane seemed to have a more equal partnership with Tom Baker's Doctor, at least on an emotional level. She was the first companion, in my opinion, whom you actually thought could have a serious relationship with him.

I was sad to see her run on the show end. None of the companions after her measured up. I also found it interesting to see her first season on the show with Jon Pertwee when those older episodes were made available in the late 80s. The previous companion, Jo Grant (played by Katy Manning), was perfectly suited to Jon Pertwee's style while Sladen's Sarah Jane was far too independent and cheeky to mesh with the fatherly Pertwee. They didn't have any chemistry at all. It's a good thing Pertwee left after her first season or I suspect Sarah Jane would not have hung around the Tardis for quite as long.

My crush on Elisabeth Sladen was long forgotten when I saw her appear once again as Sarah Jane in the new Dr. Who. It didn't take long, however, for those fond feelings to return. I thought the new team did a wonderful job of fleshing out Sarah Jane's character and exploring all those emotional bonds she had with the Doctor which the original series never dared touch on. It was a great episode and I thought how fun it would be to see her come back in a new series. Apparently, the BBC felt the same way and introduced The Sarah Jane Adventures the following year. Aimed primarily at children, I was less than thrilled with the results, but it was nice to see her back on TV.

Just a few days ago, I watched Genesis of the Daleks on DVD and listened to the audio commentary featuring Tom Baker, director David Maloney, and Elisabeth Sladen. I couldn't help but laugh at her child-like enthusiasm for everything that was happening in the story. While Tom Baker said very little, only chiming in occasion to make a well-timed witticism, Sladen rattled off constant details about the production and seemed to be able to name everyone, including the extras. It was so much fun to have her in my home, so to speak. And now she's gone. I lament that I will never hear her cry out "Doctor! Doctor!" ever again.

Wednesday, February 02, 2011

The Space Race that Never Was

The other day, I was watching Gerry Anderson's 1969 movie Journey to the Far Side of the Sun, and I found myself dozing off during the middle part of the film. It starts off well enough with some spy plot which is never fully explained, and the last third of the movie introduces an intriguing concept, but the middle is totally devoted to the development of a manned space flight to a planet on the other side of the sun. We see astronauts training, a giant rocket being built, and pudgy, sweating bureaucrats huffing about the cost and international politics. It's painfully slow and could never be done in a modern movie, but it illustrates how strong the fascination was with space exploration during the 1960s.

Having just missed space-mania (I turned 5 years old when Neil Armstrong set foot on the moon), I was always fascinated by the residual artifacts of this period which were still around during the 1970s. One of the names that surfaces fairly frequently was Willy Ley (1906-1969). Ley spent much of his adult life popularizing the idea of space exploration. He wrote several books on rocketry and outer space, first in Germany and later in the U.S. It was during the 50s and 60s, when he teamed with such people as Wernher Von Braun and artist Chesley Bonestell on books about space, that a popular public image of space travel was created.

The spaceships that these men envisioned were sometimes sleek and aerodynamic, other times clunky and utilitarian, but all were imaginative and fun. During the late 50s, Ley worked with the Monogram model company to create a series of conceptual space vehicle models. I was not aware of these models until they were re-released by Monogram in the late 1990s. Just getting back into model building after a long hiatus, the sight of these model kits on the hobby shop shelves took me back to those days of my childhood when I was teased by the images in Ley's books.

The first of these models that I built was the Space Taxi. I assume the purpose of the vehicle was to shuttle people and provisions to space stations or even the moon. It's an awkward sort of thing, but it has a certain charm. My favorite part of the design was having the wire tethers for the astronauts so they appear to be hanging in freefall.

The second Willy Ley model I built was called the Passenger Rocket. I don't have it anymore because it was destroyed when I moved from my old house to my current home, but it was a chunky red ship similar to Thunderbird 2 from the show Thunderbirds. A smaller, streamlined ship looking like a 50s-style jet fighter rides piggyback on top of the larger craft. According to the illustration on the box, the larger ship was designed to carry the smaller ship out of Earth's atmosphere and launch it once it was in space.

The variety of designs showed that Willy Ley put a great deal of thought into what an extraterrestrial society would need to function, and the fantasy that such a thriving community could exist within our solar system is exciting to ponder. I'm sure in the 1950s, with the start of the space program, it also seemed within reach.

As a teenager, long before I even knew of the Willy Ley models, I stumbled onto a spaceship model called Mars Probe. It's origins are unclear to me. It certainly was not tied into any merchandising campaign for a movie or TV show. However, the look of the craft is reminiscent of the ships Willy Ley and Chesley Bonestell envisioned. Based on what we know about the requirements for a manned flight to Mars, this rocket looks completely impractical, but it looks way cooler than the Lunar Module or the Space Shuttle.

More recently, while browsing through a hobby shop, I came across a curiosity called Apollo 27. Put out by Pegasus Hobbies, the model appears to be a fantasy vision of where NASA could have gone had they not stopped with Apollo 17. The copy on the side of the model box conjures up the hyperbolic language of the early space race: Blast off into the unknown and explore the furthest reaches of the Cosmos with the new Apollo 27 Rocket! Designed to safely transport its two man crew to wherever their mission takes them, it also provides then with an all around view was never been available to the other astronauts who traveled before them. Hyper-dynamo-tension rocket engines give the Apollo 27 an acceleration rate that staggers the mind, and yet completely protects the crew from the massive amount of G's that would normally crush them! This makes far journeys possible in just a few short months, not decades. Mars is just a hop away now!
I get a chill from that sort of thing! It's the kind of "why not?" enthusiasm that faded away after the Apollo astronauts hit a couple of golf balls around the lunar surface. With the end of the Apollo program and the appearance of Star Wars a few years later, space adventure shifted from what could actually happen to pure fantasy in a galaxy far, far away. The general public doesn't cares about making it a reality anymore. In a way,  space exploration seems just as distant to us now as it did to the early readers of science fiction pulps almost a century ago. It makes me sad.

Monday, February 01, 2010

Sci-Fi Drought After Star Wars

Pop culture history implies that the popularity of the first Star Wars movie opened the floodgates for all things science fiction during the late 70s and early 80s. While it's true that science fiction and fantasy became an economically viable genre after Star Wars, the truth of the matter was that Hollywood was caught completely off guard by the wild success of the film. It took almost two years for the studios to pump out anything close to that level of production quality.

I was a pre-teen kid who became a science fiction junkie long before Star Wars ever arrived, so I was used to scrounging around for any movies, comics, or TV shows that might feed my sci-fi fix. Unfortunately, before Star Wars, there was damn little and what there was around was of damn poor quality. Outside of Star Trek, Forbidden Planet, and 2001: A Space Odyssey, the rest was pretty terrible. After Star Wars, I was rubbing my hands together in anticipation, now certain that I would have more science fiction movies and TV shows to watch than I could handle. It was a frustrating wait, though, and I spent most of the time grasping at whatever rare bits of space fantasy I could find.

One early bit of science fiction that I found oddly intriguing came along in July 1977. While I was in a convenience store with my dad, I noticed a comic book on the spinner rack titled Richie Rich Meets Timmy Time. I was not much of a Harvey Comics fan at the time, but because the comic had a science fiction theme, I had to have it. In those days, my dad was in real estate and I would often drive around with him as he ran various errands (e.g., dropping off a contract, picking up a contract, putting a "for sale" sign in a yard, etc.). Anyway, my dad stopped off at a house to do some business and I sat in the car reading my new comic. I can still remember sitting in my dad's 1973 Mazda RX-3 with the windows down. The sultry night air blew through the cabin and an ad played on the radio for the movie Kingdom of the Spiders starring William Shatner.

The comic starts out with Richie Rich and his friend Gloria playing on one of his private beaches when he thinks he discovers gold. Out of thin air, Timmy Time and his robot companion Traveler appear. Timmy wears a space suit and has prematurely white hair while Traveler looks like a vertically stretched green fedora with arms. The "gold" that Richie discovered is actually a mineral known as igneous tholerine and is used to power space ships in the far off year of 2019. Timmy goes on to explain that his robot can help him travel through time, which is how they came to end up in 1977. To illustrate his point, Traveler takes Timmy, Richie, and Gloria to 1883 just as Krakatoa is erupting. Fortunately, Traveler can also put a force field around them to protect the gang from the lava. Returning back to present day 1977, Timmy and Traveler relate their origin.

Here we meet Timmy's dad who is the captain of a space ship. The ship is about to be bombarded with meteors, so the crew gets into the escape pod, only to be struck directly by a meteor. Timmy decides the only way to protect the escape pod is to fly back to the main ship in a space suit and put the ship directly in the path of the meteors. As soon as he reaches the ship, another meteor tears through the hull (although it apparently does not suck out all the air). From the meteor emerges Traveler who almost immediately whisks Timmy away even before we can learn why he was trapped in a meteor to begin with. Traveler takes Timmy back to caveman days where we're treated to some friendly hi-jinks with some dim-witted cavemen. They then return to the space ship at the same time when they left so Timmy can do exactly what Timmy set out to do in the first place, which was block the meteors and save the escape pod. Although Traveler did nothing but get in the way and provide some feeble comic relief, Timmy befriends the robot and we are set up for what will undoubtedly be many more adventures to come.

Although the story doesn't sound like much now, I was pretty impressed at the time with the adventure elements of the story, especially since it was essentially a Richie Rich comic. The artwork was done by Ernie Colon, who walked a fine line between cartoony and serious comic art styles. It reminded me of the Walt Disney comic adaptations made of their theatrical releases.

Inside the comic was a survey form you could send in to tell Harvey Comics whether you thought Timmy Time was "great, okay, or not so hot." My guess is that no one even bothered to send in the forms because Timmy Time never appeared in another comic book again. I kept waiting, but it never happened.

Another bit of science fiction fun I remember during this lean period was the TV show Quark starring Richard Benjamin as the captain of an intergalactic garbage ship. Created by Buck Henry, the idea was to do to science fiction what Get Smart! did to the spy genre. Besides Benjamin as Adam Quark, the ship was populated by a transmute (half-man, half-woman) named Gene/Jean (Tim Thomerson), a young blonde and her clone both named Betty (Cyb and Patricia Barnstable), a humanoid plant with no emotions named Ficus (Richard Kelton), and a clunky robot called Andy (Bobby Porter). Quark took his orders from a spineless bureaucrat named Palindrome (Conrad Janis) who in turn took his orders from a giant, disembodied head aptly called Head (Alan Caillou). Although Quark's primary responsibility was picking up meteor-sized Hefty bags of trash from spaceships in the galaxy, he was always angling for bigger missions, which usually led him into big trouble.

The ultimate problem for a show satirizing science fiction films and TV in 1978 was that, since there was so little science fiction out there that the general public would recognize, the story options were limited. The first episode, a one-hour special which premiered on February 24, 1978, was a Star Wars parody called "May the Source be with You." The following week, the story was a parody of the Star Trek episode "The Deadly Years." The week after that, another Star Trek parody, this one based on the episode "Mirror, Mirror." Other episodes spoofed 2001: A Space Odyssey, Flash Gordon, and - oh yes - more Star Trek episodes. Only seven episodes in and the limitations of the format were already beginning to show.

Nevertheless, I loved the show, not only because it made clever references to the shows I loved, but the premise itself was quite amusing for a 13-year-old. During that long, cold winter, Quark was a lone bright spot on a Friday night. In fact, I remember walking home from school with my friend Vince and he said that watching Quark was the only thing he had to look forward to. He would soon have to find something new to sustain his existence.

Quark finished its run on NBC with the airing of the pilot episode as its eighth and final installment. The night it aired, I was once again out with my dad going to someone's home. A small girl was in the living room watching the pilot episode and I was trying to catch some of it from my vantage point in the foyer. The show looked different somehow. The sets were darker. The girl's brother walked in and asked stupidly, "Are you watching Quark?" She replied, "Yes, but it's different. Palindrome's office had changed and Ficus isn't in the show." Before I could learn more, my dad was finished with his business and led me out of the house. I was wondering about the changes in the show, but I figured I could catch up next week, or watch the reruns during the summer.

Of course, none of this came to pass. The show had been canceled and never saw the light of day for decades to come. I only recently saw the pilot episode on DVD, where instead of Ficus there was a crotchety old scientist named Dr. O.B. Mudd (Douglas Fowley), another obvious Star Trek reference. It's difficult to watch these episodes now. Although amiable enough, they aren't very funny and the humor is rather broad. All you have to do is look at Futurama to see how far our awareness of science fiction pop culture as progressed along with the speed and snarkiness of our humor.

The science fiction drought continued through the summer of 1978, and I contented myself with Flash Gordon serials and reading old Edgar Rice Burroughs books. Hollywood finally got on the ball when Battlestar Galactica hit the air waves. The stories were pretty bad, but the special effects and production values were on par with Star Wars. By the spring, Alien would arrive in theatres and the drought was officially over.

Thursday, December 17, 2009

A Very MTV Christmas

After seeing some of MTV's newest train wreck Jersey Shore, I couldn't help but lament the sad turn that cable television has taken. I recognize that showing music videos 24/7 was a novelty which lost its luster by the mid-80s, and there are still some all music channels if you are willing to buy into some of the premium packages, but the charm of the old MTV went beyond just music with pictures.

The Video Jockeys, or VJs as they were called, provided a homey sort of connection between the viewer and the pop music world. Because they came into your home every day, and because they were talking directly to you like a radio personality, you felt as though they were a part of the family. As MTV became more popular and rock stars scurried to get air time, not only through their videos but in person, the VJs were the people who provided the conduit to our favorite musicians. Since the VJs felt like family, and they brought the musicians into our homes, I think the audience felt closer to the rock stars as well. And I don't mean in the sleazy paparazzi way of today where we see them stumbling out of clubs at 3 a.m., but in the way they wanted to be presented and the way we wanted to see them: as musicians.

This homey connection to MTV was never more strongly felt than at Christmas time when MTV would put together a special Christmas video featuring a musical performer and the MTV VJs and crew. The first such video appeared in 1981 (their first year of operation) and featured Billy Squier. As you watch, you'll see Tim Kazurinsky who was a new member of SNL at the time. Nowadays, both Billy Squier and Tim Kazurinsky are probably not very well known to the general public, but they were hip stars at the time:


The following Christmas, the MTV Christmas video featured Joe "King" Carrasco. Again, not well known today, but at the time he was a hot property thanks to his song Party Weekend. The video is a Christmas variation of that song, incorporating his musical style with well known Christmas songs.


In 1985, Pee Wee Herman and Bryan Adams did a little Reggae Christmas video.


The one that sticks out in my mind the most was in 1986 when the Monkees provided a Christmas medley. There's a bit at the end that was a pretty big surprise at the time.


During 1986, the Monkees were having a huge comeback with a new single and a tour. Unfortunately, Michael Nesmith claimed that he was too busy to participate. I think it had more to do with the fact that he didn't want to participate if he didn't have complete control over the project, but whatever. His appearance in this Christmas video was quite a shock at the time and made it all the more special for us Monkees fans out there.

You'll notice also that some of the VJs had changed by 1986. Nina Blackwood and J.J. Jackson had been replaced by Grace Slick's daughter China and the ever annoying Downtown Julie Brown. This was the beginning of the end for the old MTV. Soon they would be running compartmentalized segments like Yo! MTV Raps and Headbanger's Ball with specific hosts for each show. The original free-wheeling format gave way to a tighter, more network-like structure, forever killing the special charm of the channel.

When I was young, I never wanted to be one of those old fogeys who always talked about how things were better in the olden days, and I don't believe I am since I don't subscribe to that notion...entirely. But around Christmas time, it's nice to look back at things that were so special in their time and can never happen again.